![]() Warning:
Warning:
|
On its own, IBM's Domino Server, Microsoft's SMTP Server in IIS and Exchange (prior to Exchange 2003) are vulnerable to the Reverse NDR attack, which will make it into an unwitting indirect mail relay. Exchange 2003 has a different vulnerability known as the Directory Harvest attack. You can check your vulnerability using the Reverse NDR test page on the CMS website. To protect against this, you must populate the Approved local addresses list with all your valid local email addresses and enable the Reverse NDR rule in Praetor. |
To fully configure the Virtual SMTP server you must first define your local domains and specify the IP address where messages will be delivered. Then you need to test for successful mail deliverability using these settings. This section describes how do perform these tasks.
|
1. |
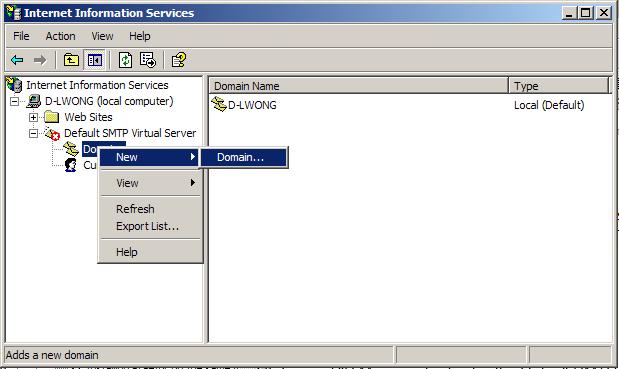
Run the Internet Information Services (IIS) manager (from Control Panel's Administrator Tools folder) to display the Default SMTP Virtual Server in the left pane and select the container. Right mouse click to select -> as shown below.
| |
|
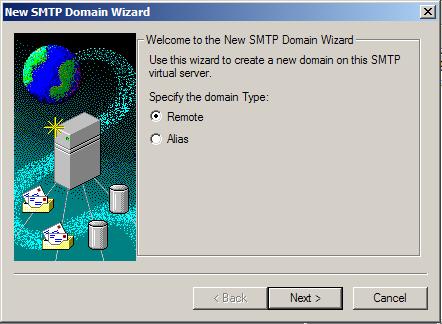
2. |
This will open a window for you to select the type, which should be the default Remote button.
| |
|
3. |
Press
| |
|
4. |
Press
| |
|
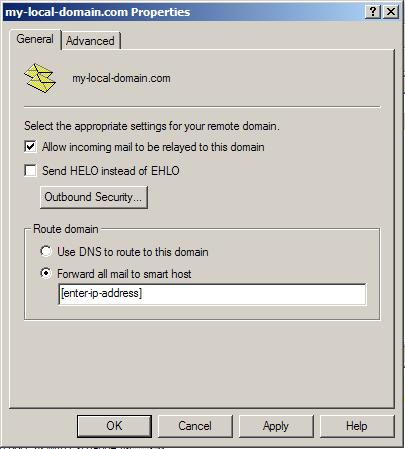
5. |
Next, select your newly created remote domain and right-mouse click to view its properties.
As shown above, select the checkbox to and button . In the field below, enter the IP address for your receiving mail server surrounded by square brackets. Press If you have more domains, repeat the above steps for each remote domain. Note that it is fine if the IP addresses for all your remote domains are to the same mail server.
|
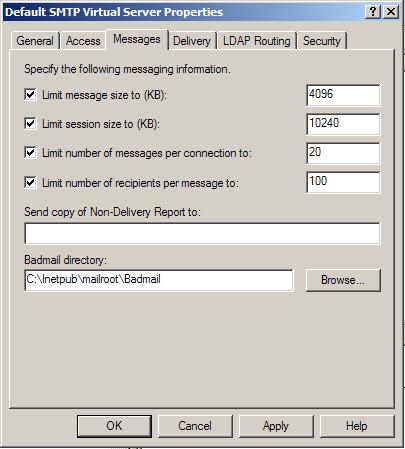
All the remote domains you created are under the single (default) SMTP virtual server, and thus the message limits set for this server will apply to all these domains. Among the global settings are limits with the following default values:
Per-message size limit of 4096 KB
Per-session (delivery) of 10240 KB
Per-session number of messages to 10
Per-message number of recipients to 100
If you want to change these values, view the properties of the SMTP virtual server and look on the Messages tab.
Press  to finish configuring these limits on message
delivery.
to finish configuring these limits on message
delivery.
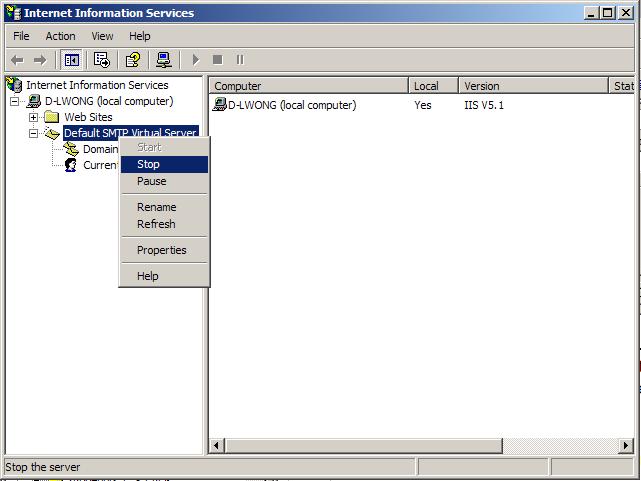
Finally, stop (if running) and restart the IIS SMTP Server to make these changes take effect.
Once your local domains has been defined, you need to test the SMTP virtual server for deliverability to a real address at each local domain. One method to do this is to use the Microsoft Outlook Express email client to send this test message directly to this SMTP virtual server. Other email clients may also be used but this section will describe how to use Outlook Express 6 to perform this testing.
![]() Warning:
Warning:
|
If you are trying to test mail delivery to non-local (remote) domains on the Internet, you will need to add the IP address of the Outlook Express machine onto the IIS SMTP Server's Relay list. This is because the IIS SMTP Server is set to prevent relaying by default, and your Outlook Express testing to remote domains would appear as a relay attempt. Click here to find out how to set this up. |
|
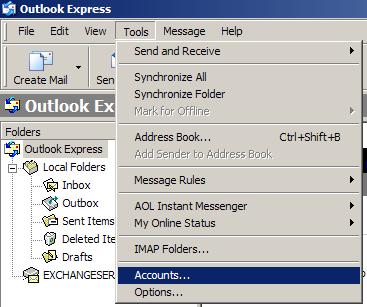
1. |
Create a mail account in Outlook Express by selecting -> .
| |
|
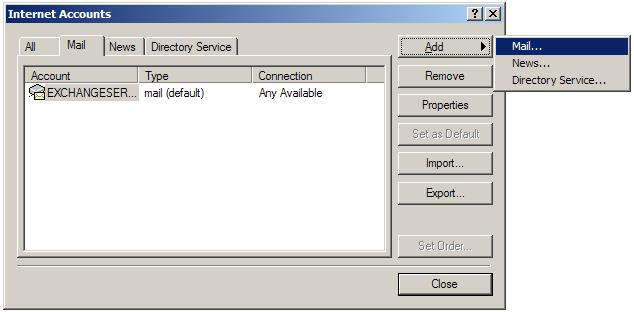
2. |
When the Internet Accounts window
appears, select the Mail tab and
pressing
| |
|
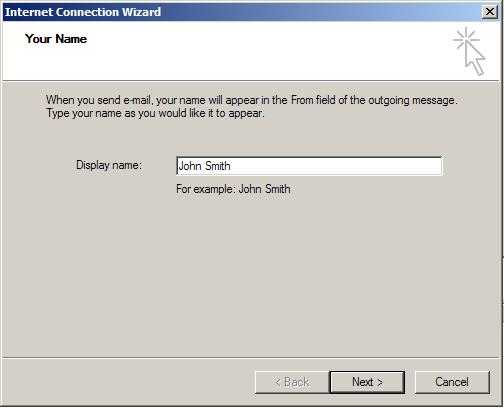
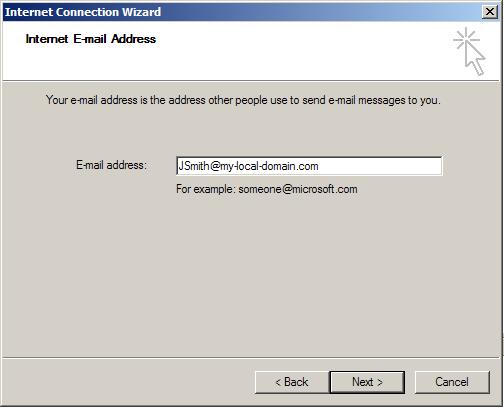
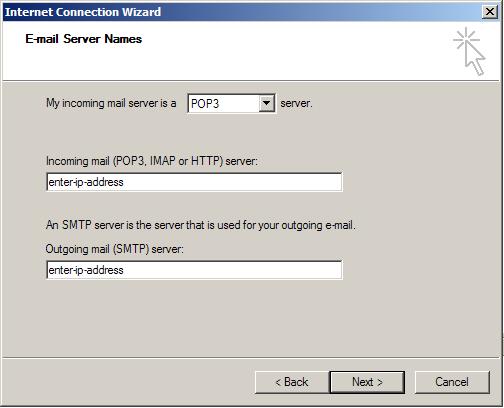
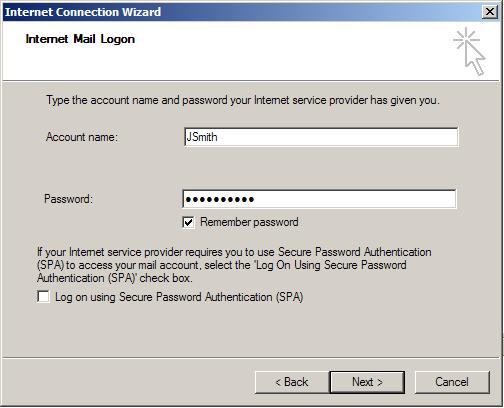
3. |
This will invoke the Internet Connection Wizard to prompt you for various pieces of information.
| |
| 4. |
When completed, click
| |
|
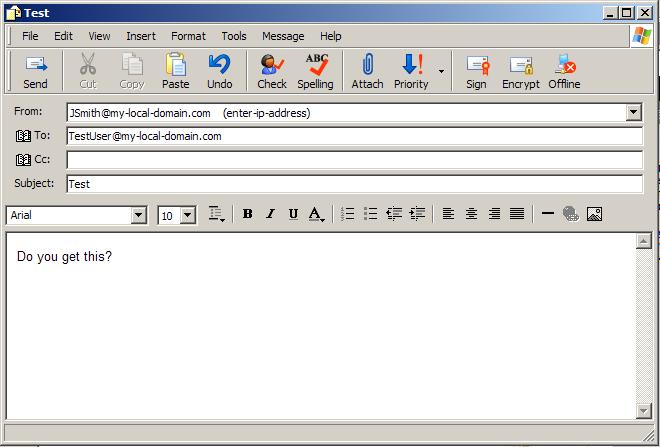
5. |
Compose the test message to a valid address in your domain.
Press
| |
|
6. |
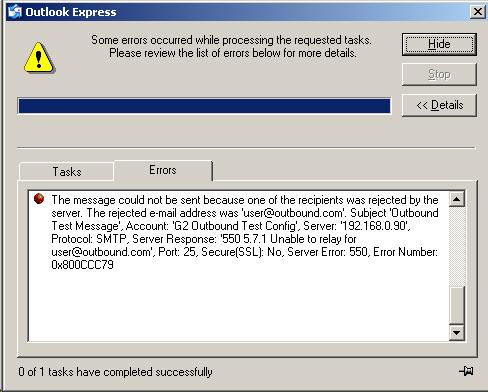
Use your normal email client to verify that the message was properly relayed by the SMTP virtual server and sent to your specified mail server (in step 5 of setting up the new domain properties for the SMTP virtual server.) If mail deliverability is unsuccessful, you will need to get it to work before proceeding with Praetor installation.
|
Before you can successfully test deliverability to non-local (remote) domains on the Internet, you will need to configure the IIS SMTP Server so that it does not see your test message from Outlook Express as a relay attempt.
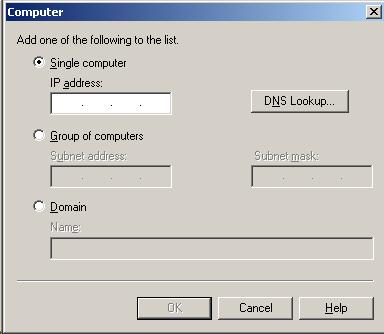
To avoid this problem you will need to add the IP address of the Outlook Express machine so that it is permitted to use IIS as a mail relay. This is done via the IIS Manager by selecting the SMTP Server properties, specifically those shown on the Access tab.
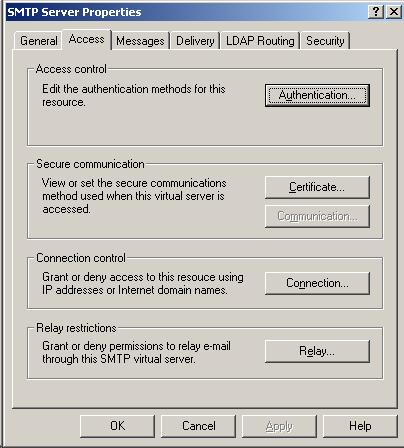
Press on the  button and enter the IP address of the Outlook
Express test machine in the field shown below.
button and enter the IP address of the Outlook
Express test machine in the field shown below.
 to enter the remote SMTP domain name.
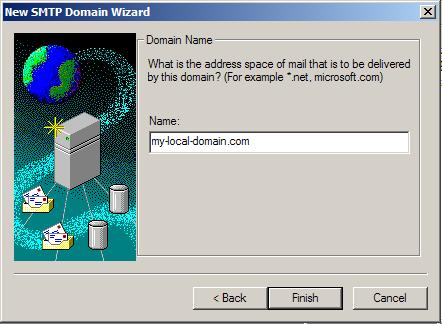
 and you will be returned to the list of domain
in the right pane.
and you will be returned to the list of domain
in the right pane.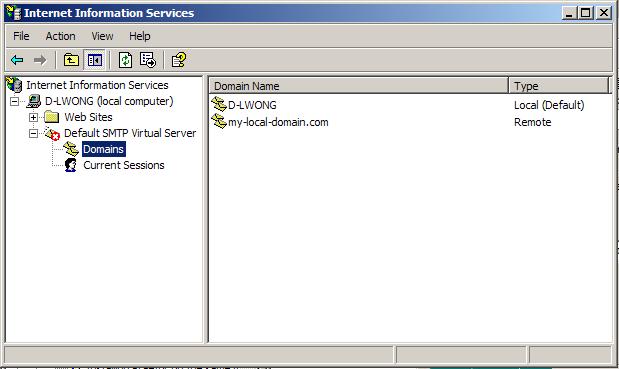
 .
.
 to send the message.